
Before you set up your digital twin, we highly recommend you read through these best practices for creating and activating alignment points.
What are alignment points?
Alignment points match the virtual world with the real world. Each alignment point syncs a particular location in the real world, like your front door, with that same location in your digital twin. This ensures that your virtual content (virtual staging, custom tags, media etc) will appear in the correct position, with the right rotation and scale.
Having good alignment points will be crucial to your experience with the ARConnect app.
There are two parts to this - creating alignment points in CAPTUR3D, and activating these in ARConnect. Let’s go through some best practices for both.
Tips to create good alignment points in CAPTUR3D
- Choose a prominent location: your first alignment point should be where you want users to start their experience. For example, the front door or foyer.
- Make sure you have great lighting: ARConnect relies on visual detail to match the real world with your digital twin. So try picking an area in your space with a lot of natural light.
- Avoid mirrors and windows: the app may be confused by the reflection. You want to select an area that has a lot of contrast and visual features.
- Avoid plain walls and repeating patterns: just like plain white walls lack distinctive visual details, repeating patterns like wallpapers are equally problematic for this reason.
- Avoid furniture that is likely to move: you’re much better off creating an alignment point along the base of a doorway, than along the base of a couch.
- Measure left to right: this is vital! If you don’t measure your alignment point from light to right, your virtual content will populate in reverse.
- Hold down the shift key: when you’re measuring your alignment point, hold down the shift key to get a more precise measurement.
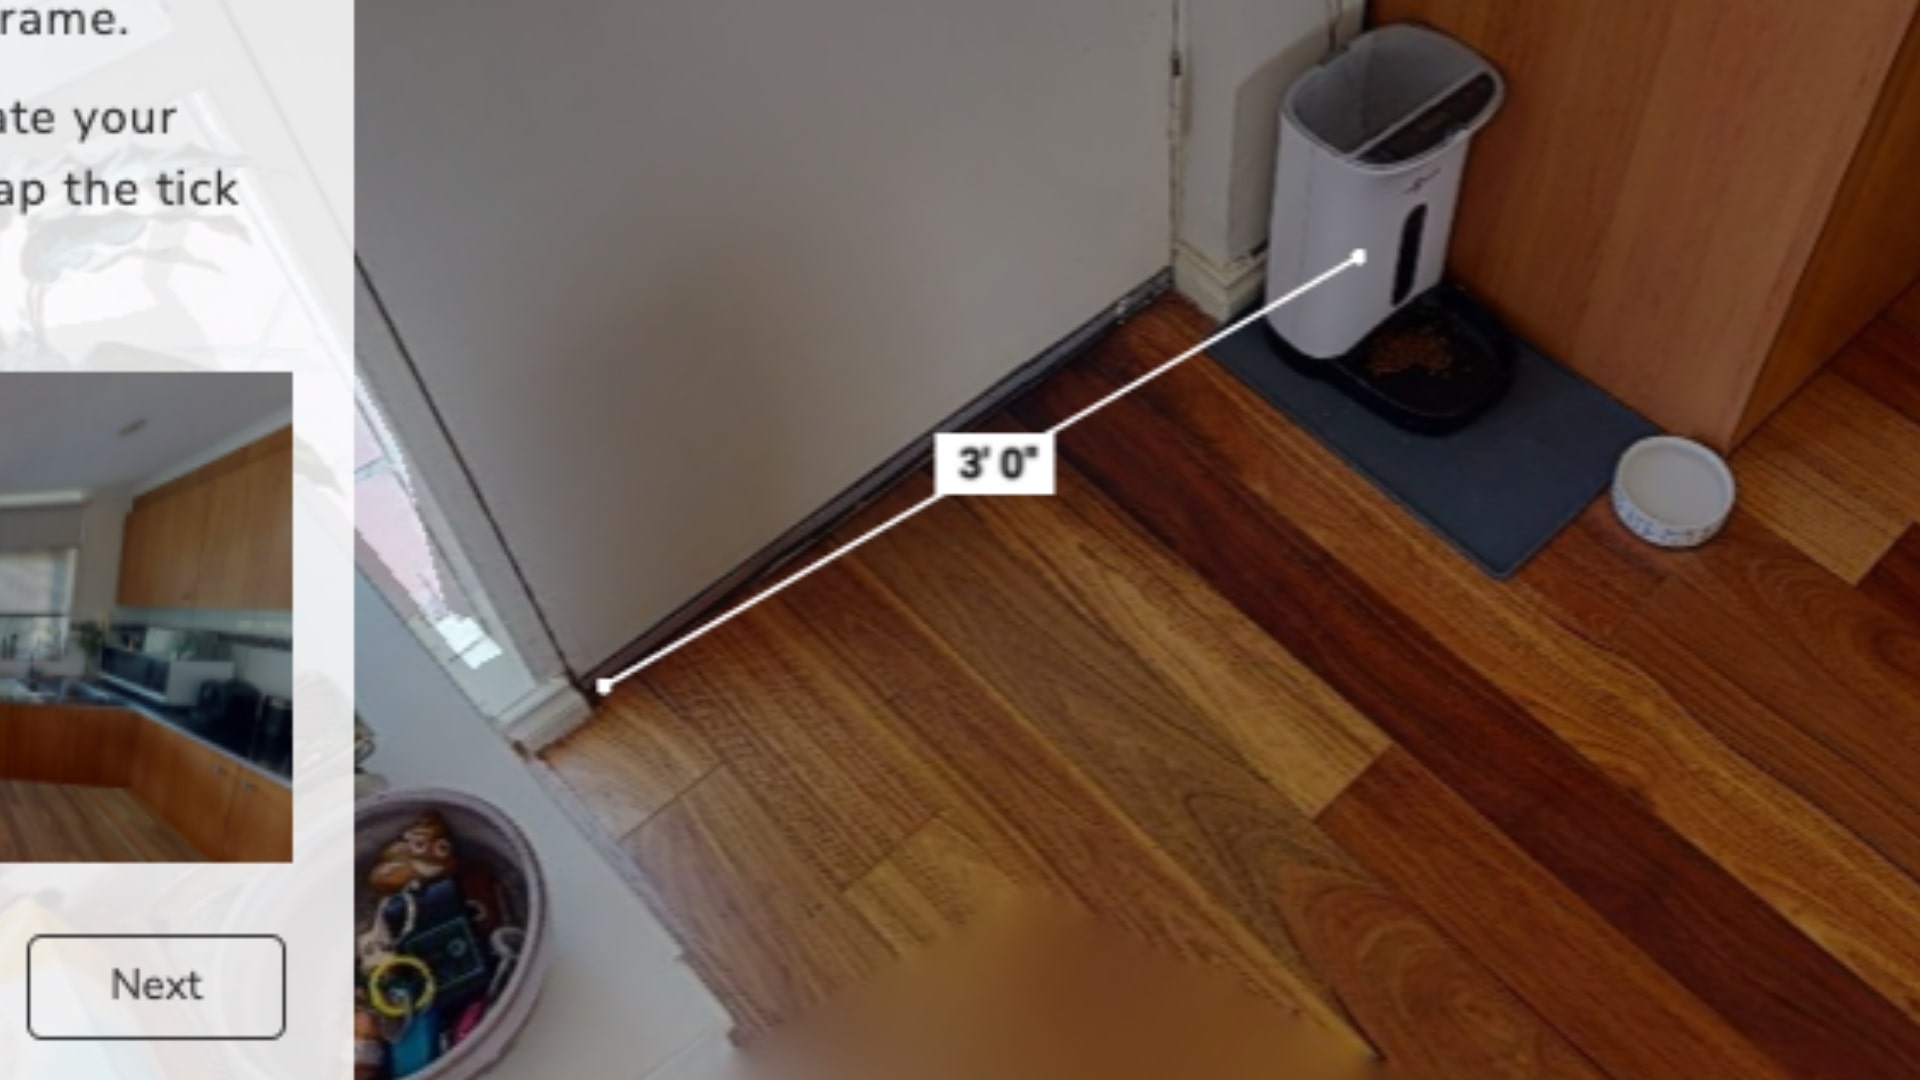
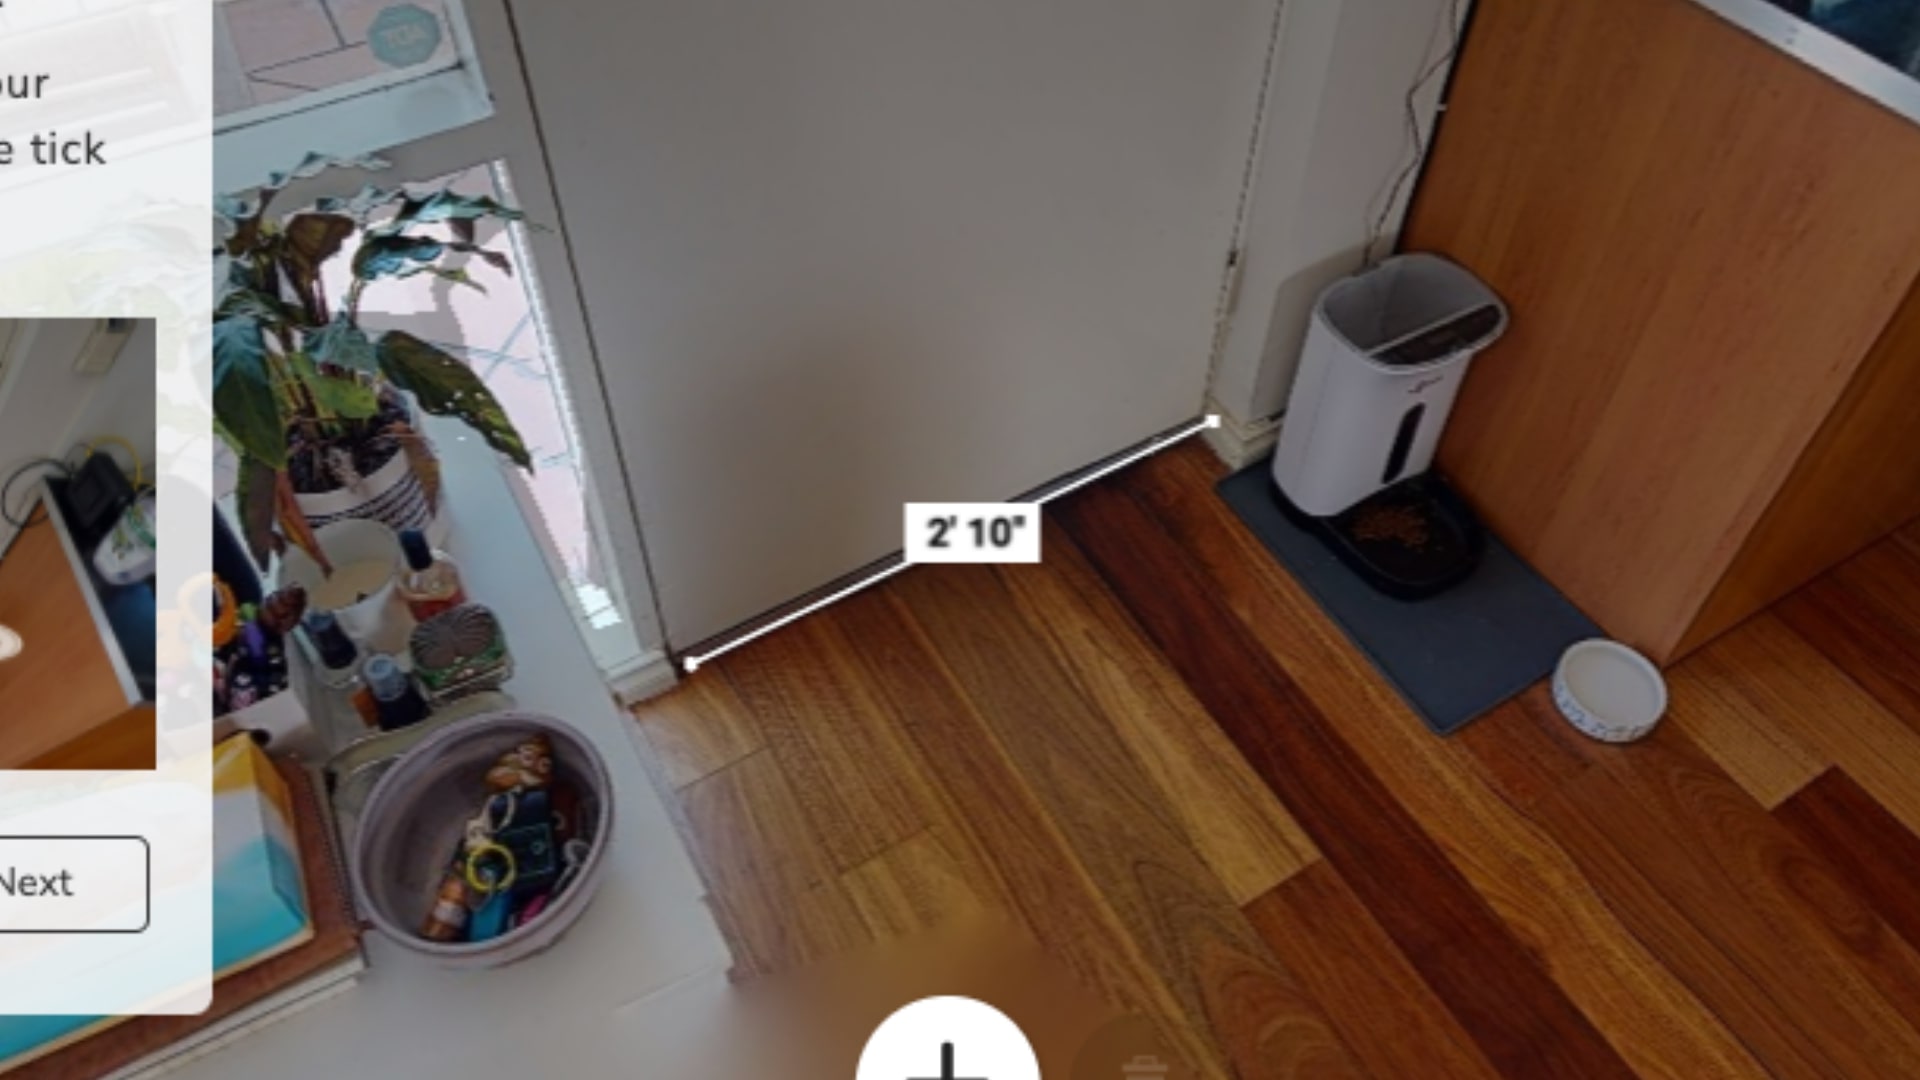
- Check the angle of your measurement: sometimes when you measure your alignment point, it may appear perfect from one perspective, but the angle is wrong from another. What this means is that all your virtual content will populate on an angle, which we don’t want. So once you’ve measured your alignment point from left to right, navigate to view the measurement side-on to ensure it looks good from all perspectives.
Bad alignment: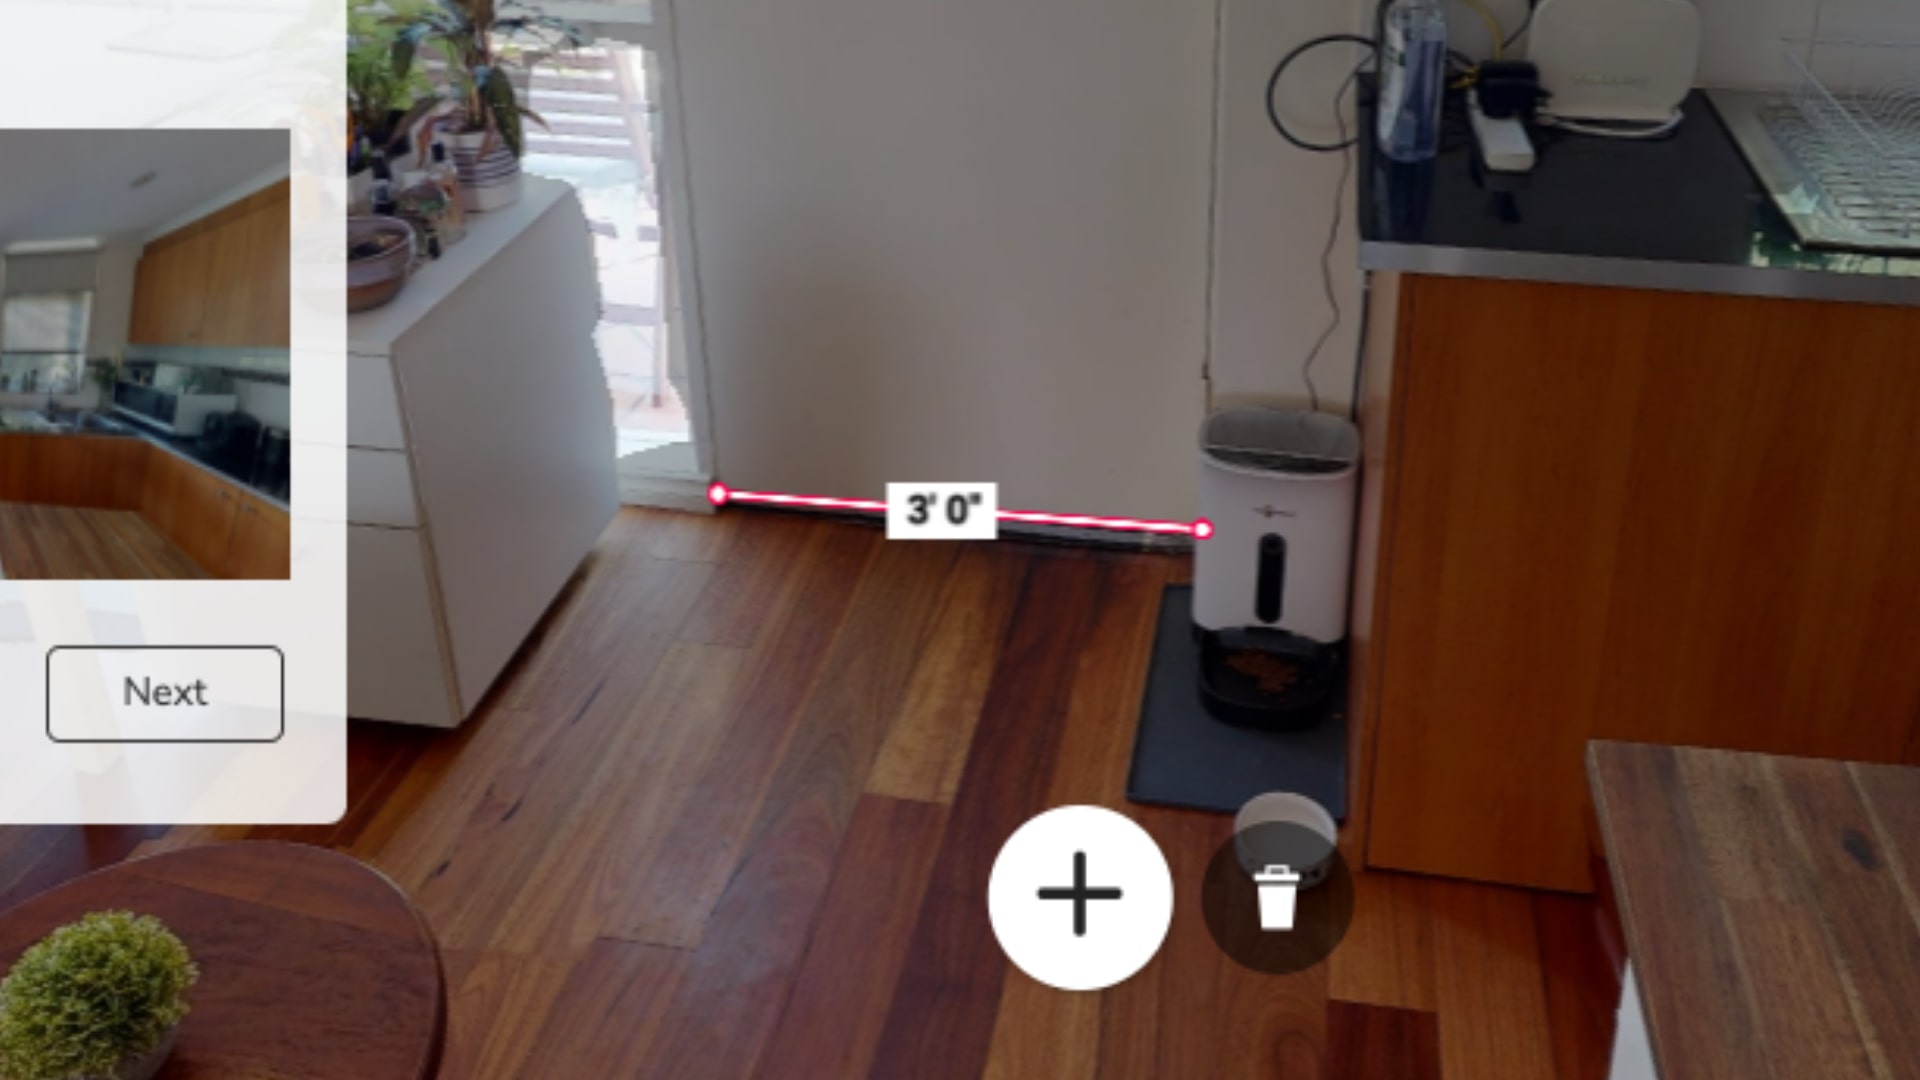
Good alignment:
- Set up alignment points at 5-10m intervals (16-32ft): this will allow the app to maintain alignment more easily as users move around the space.
Tips for aligning in ARConnect
Assuming you’ve followed all the advice about creating alignment points in CAPTUR3D, the next phase is activating these points in ARConnect.
If you’re not sure how to do this, please read our other handy support article :)
- Ensure the area is well lit: try doing this during the day, and with all lights turned on.
- Keep steady: while you’re scanning your space, you want to keep your motions as smooth and steady as possible.
- Remove obstructions: make sure miscellaneous objects, animals (and people) are out of the way while you’re scanning.
- Check your internet connection: the stronger your internet connection, the easier it will be to activate your alignment points.
- Measure left to right: just like this is important in creating alignment points, it’s equally important in activating them!
- Check the angle of your measurements: again, you need to view your measurement from either side to ensure the angle is correct. The more accurate your measurement, the more accurate your alignment and your user experience.
Comments
0 comments
Please sign in to leave a comment.